Saturday, October 25, 2014

Greek Salad made with Israeli couscous

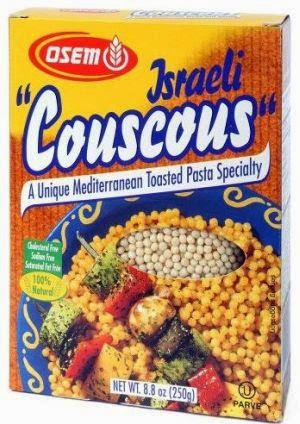
A couple years ago, I was browsing the "ethnic foods" section in Albertson's. It's small because I live in a predominantly Caucasian area but I was pleasantly surprised to find some food stuffs I wasn't familiar with such as Israeli couscous. Naturally, I bought a box to try out. Israeli couscous is larger in diameter than what most people are used to because it's not true couscous; it's made from hard wheat and is more like pasta. Created during the "austerity" period in Israel, 1949 to 1959, "ptitim" was developed as a substitute for rice. I like Israeli couscous because it's sturdier than some of the smaller pastas like orzo and even better, it doesn't clump. It remains fluffy rather than merging into one dense mass in the bottom of the bowl. Ptitim also has a chewier texture so if texture is an issue for you, don't even bother. Seriously. 

This is yet another recipe which I threw together late one night for a family dinner the following day, so it's been recreated as well as I can. 

Ingredients:

1 box of Israeli couscous, cooked according to the directions on the box
1 cucumber, peeled and diced
3 medium tomatoes, diced
quarter cup or so of sliced kalamata olives
half cup or so of crumbled feta cheese
half a red onion, diced
juice from 1 lemon
quarter cup or so of good olive oil
2 TBSPS or so of fresh dill, minced
salt and pepper to taste

Cook couscous according to the directions on the box OR boil 2 cups of water with a pinch of salt, add 1 1/4 cups of Israeli couscous, bring back to a boil, cover, turn down to a simmer and cook 8 to 10 minutes. Don't drain--all the liquid should be absorbed. Let cool. Put in a large bowl and add the rest of the ingredients. Mix thoroughly, taste, and adjust seasonings accordingly.


Cook's Notes:

1. Seriously, use FRESH dill and FRESH lemon juice for the dressing.  If you don't, may the fleas of a thousand camels infest your underwear.  Neither item is very expensive and the dill will last a couple weeks if you keep it in its original packaging and store it in the fridge.

2. When I tell you to taste and adjust your seasonings, there's a couple reasons for it. One is because seasonings added at different points in cooking taste different. Fresh pepper loses its bite when added at the beginning stages of a dish whereas if you add it at the end of cooking or right before serving the dish, you're able to appreciate to taste and appreciate the flavor. Dried herbs need to be added earlier in the cooking process in order to extract their full measure of flavor and fresh herbs are used more as a garnish or a finishing touch otherwise they lose all their brightness and taste.

Another reason you need to taste and adjust is because taste is subjective. What I like is not necessarily what you like. You're making the recipe, you make it taste how you want it to taste.
Monday, October 20, 2014

Mo's Banana Bread

Quick breads are pretty amazing. You mix up the batter in one bowl in a matter of minutes, pour it in a loaf pan or two, and then let it bake for an hour. Simple. 

I can't recall where I ran across the framework for this banana bread recipe. I read so many recipes that I lose track of where I find them, and I do mean "read". I read the intro, I read the ingredient list, I read the notes, I read the feedback. I have to visualize all of it and then I have to decide if the recipe is feasible: availability of ingredients, ease of making, weird techniques, and so on.

I do know that I was searching for a lower fat, lower sugar, possibly gluten-free banana bread. Because the bananas have natural sweetness and even unsweetened applesauce is sweet, there's very little sugar in the recipe. I named the recipe for a friend of mine who needed gluten-free options for herself and her son.

Ingredients:

4 very ripe bananas
1/3 cup brown sugar
2 eggs
1/2 cup applesauce
1 TBSP baking powder
1 tsp vanilla extract
1 tsp salt
1 tsp baking soda
1/2 tsp ground cinnamon
1/2 tsp ground nutmeg
2 cups flour

Preheat your oven to 350 degrees. Grease one standard loaf pan and set aside.

In a large mixing bowl, mash the bananas well with the brown sugar and vanilla extract. Add the remainder of the ingredients. Mix thoroughly but quickly to incorporate all the dry ingredients. Scrape into the prepared loaf pan and gently tap the pan against the counter to distribute the thick batter more evenly.

Bake for about an hour or until a knife or skewer inserted in the middle comes out clean. Let cool on a wire rack for 15 minutes or so and then gently turn the loaf out of the pan and allow it to cool completely before serving and storing.

Cook's Notes:

1. As always, you can add about a 1/2 cup of nuts, chocolate chips, or dried fruits. If you add in too many goodies, the bread be as moist nor will it hold together.

2. Applesauce is used instead of any fats in this recipe. While it's a good substitute in small batch recipes such as this banana bread, applesauce is not oil and therefore it will not behave as oil. Oil in baked goods coats the flour and helps prevent starches from forming which inhibits the creation of gluten. However, if you mix any batter long enough, you can push through and develop gluten which will cause your quick bread (or brownies or birthday cake) to be tough and dry. Applesauce contains pectin. Pectin gels to a certain extent, but it simply doesn't have the same properties as oil. To that end, like brownies, don't over mix the batter!

3. Let's discuss flour. I think the best proportion of flours for this recipe is one cup of all purpose flour and one cup of whole wheat flour. The whole wheat flour adds a nice nutty flavor as well as some fiber but I've found that using all whole wheat flour makes the quick bread too dense and dry. You can also substitute a gluten-free flour blend with pretty good results.

Friday, October 17, 2014

Zippy Shrimp

I am a bad Norwegian. I don't care for seafood at all and the fact that I recently ate and enjoyed a bowl of salmon chowder is a major milestone. And I try, you guys. I have tried baked fish, roasted fish, smoked fish, raw fish, imitation fish, seafood chowders and soups and even tuna casserole. Nope. Although I admit, there are a few exceptions: fried clam strips, my friend's kick-ass clam chowder, and the occasional tuna sandwich. And I do cook fish and seafood for other people, but the smell generally turns my stomach. And the weird bit? I love to peruse the fish counter at the Asian markets and at Pike Place because I love sea life in all it's multitudinous shapes, species, and colors--I just don't like eating them!

"Zippy" refers to both the speed of the dish and the bite of the red pepper flakes; pretty ingenious, huh?


Ingredients:

2 pounds shrimp, peeled and de-veined
1/3 cup light olive oil
1/4 cup fresh lemon juice
3 cloves of garlic, mashed
2 TBSPS fresh basil, chopped
2 tsps paprika
1 tsp red pepper flakes
Salt & pepper to taste

Heat oil in a large skillet over medium-high heat. Briefly saute the garlic until translucent but be very careful not to burn it. Add the pepper flakes and paprika and cook for about 30 seconds to release the flavor. Gently slide the shrimp in, making sure they're coated in the seasoned oil and then add the fresh lemon juice. Cook for a few minutes longer until the shrimps are pink. Remove from the heat immediately and transfer to a nice serving bowl. Taste and season with salt and pepper. Garnish with the chopped basil before serving.

Cook's Notes:

1. Have everything prepped and ready to go because this dish is done in like five minutes. Seriously. Once the oil's heated, each ingredient added to the oil only needs a brief cooking time. Garlic burns quickly, spices will lose their flavor, shrimp turns rubber in the blink of an eye.

2. Guys. Lemon juice. Don't ever buy the bottled stuff. Fresh lemon juice contains just fresh lemon juice and maybe a little lemon oil from the peel. Bottled lemon juice contains preservatives (which no one needs). Besides, your hands smell delicious after cutting and squeezing fresh lemons and really, who doesn't want to smell delicious!

3. While you can serve the shrimp as a separate main dish with a starch on the side, you can also add a little heavy cream to make a sauce and toss with the pasta or stir it into the risotto. I've served zippy shrimp skewered with toothpicks as an appetizer for a family dinner I catered for friends and I've also made the dish as a main meal for my previous meal clients several times.


Saturday, October 11, 2014

Holly's Potato Salad

Summer is nearly done as I write this and it may actually be fall by the time I publish it. Potato salad is a quintessential summer food, present at barbecues, picnics, and tailgating parties throughout the hot summer months. Speaking of tailgating, this is a great recipe for all you football fans out there. I am not a football fan (is there such thing as an anti-fan?) but I'm more than happy to provide you with recipes.

As some of you may know, I don’t have specific recipes for any of my potato or pasta salads, so this is how I’d talk you through it if I was in the kitchen with you. I think it's a better way to learn how to cook because then you have to rely on your instincts which makes you a better cook in the long run. But that's a completely different post.

Ingredients:

8 or 10 small red or yellow potatoes, scrubbed, unpeeled, cut into uniform chunks (depends on how many people you’ll be feeding)                                                                                                                                                                                                                                                                      
Five or six slices of good bacon, sliced into uniform pieces
about 1/2 cup Best Foods mayo (my preferred brand of mayo)
about 1/2 cup sour cream (I like "Daisy" brand because it's just cream.  No weird additives.)
about 1 teaspoon spicy brown or Dijon mustard (if you want a little more "tang")
about 1/4 cup white vinegar
about 1 tablespoon finely chopped fresh dill (or chives)

Boil the potatoes in a large stockpot and make sure you heavily salt the water so the potatoes absorb it (I personally don’t add extra salt to the salad later on but always taste and adjust the seasonings to your personal preference). The potatoes are done when you can easily pierce one with a paring knife. Drain the potatoes but DO NOT rinse them. Pour the white vinegar over the potatoes, transfer them to a rimmed baking sheet, and let them cool for 20 minutes or so in the fridge. While they cool, fry up the bacon pieces til they’re nice and crispy. Use a slotted spoon to scoop them out and drain on some paper towels. When you’re ready to finish assembling the salad, transfer the potatoes to a large bowl and add most of the bacon and dill (or chives), reserving some of each to garnish the top. Add the mustard and equal amounts of the mayo and sour cream; I use a silicone spatula and just kinda gob it in the bowl. Mix everything together gently but thoroughly, sprinkle the reserved bacon bits and dill (or chives) over the top and refrigerate for a couple hours or until ready to eat.

Cook’s notes:

1.  The vinegar adds a nice base flavor to the potatoes which, let’s face, can be really bland even with various dressings.

2.  I like to use equal parts sour cream and mayo (and there’s is only one kind of mayo, people!) as the sour cream adds a tangy flavor whereas just mayo can be too rich. Use the best bacon you can afford; I like to buy it from the butcher block at Albertson’s when it’s on sale and freeze it.

3.  As for the dill or chives, I am fortunate enough to grow both in my little herb garden so I can walk right out and snip some. If you don’t have that option, you can find fresh herbs in little plastic containers in the produce section. You’re unlikely to use all the herbs in the containers before they wilt or rot, so my side note to you is to use the dill on salmon or chicken and if you buy chives, try them in a green salad or mixed into a simple biscuit recipe (heck, use Bisquick!).

4.  Reading through the “recipe”, I noticed that I specified “uniform” pieces twice. The first reason is so that the food cooks uniformly (ha!); but seriously, you want all your potatoes to be the same consistency and not have some mushy, some perfect and some “bony”. The second reason is aesthetics; it’s all about the presentation.

5.  One other thing; if you don’t have a Dijon mustard, use what you have. If you really like Miracle Whip, well, you have issues, but by all means, use that instead. Love onions?  Finely dice a slice or two and toss them in. Garnish your salad with sliced hard-boiled eggs. Add black or green olives. Potatoes are versatile and can take just about anything you throw at them.

I made a batch of this potato salad for the cast and crew of a web series last time I catered their shoot and the director told me how much they loved it. I'm always a little amazed that such a simple recipe can elicit such praise, and on the other hand, that's exactly what I strive to do: use a handful of great ingredients to make delicious food.

Thursday, October 2, 2014

Tomato Basil Soup with Ricotta-Parmesan Dumplings

Here in the Pacific Northwest, we've had an amazing summer! But I'm a true Washingtonian native in that I'm eagerly awaiting cooler weather and yes, rain. It helps that the nights are cooling down so we get some relief from the unfamiliar heat. I'm planning on making soup at least once a week from now until spring. Soup is the ultimate comfort food and it can so easily be doubled or tripled if you're feeding a crowd. I made this tomato soup last year and it made enough to feed nine people and there were still leftovers. And listen, unless you have a bumper crop of tomatoes from your garden or if someone gives you a bunch of them, it's perfectly acceptable to use canned tomatoes to make soup or pasta sauces. 

Soup:
  • 2 (28 oz) cans, crushed tomatoes
  • 6 cups stock, vegetable is preferred
  • 4 cloves garlic, minced
  • pinch of red pepper flakes (adds flavor but not heat)
  • some olive oil
  • juice from 1/2 fresh lemon
  • 1/4 cup fresh basil, minced or 2 TBSPS dried basil
Dumplings:
  • 1 cup ricotta
  • 1 cup parmesan
  • 1 1/3 cups flour
  • 2 eggs
  • salt & pepper to taste
  • 1/4 cup basil, minced
In a large stockpot, heat a couple splashes of olive oil over medium & add the minced garlic & chili pepper flakes along with a pinch of salt.  Cook for a few minutes & don't allow the garlic to brown.  Add the canned tomatoes, juice & all and the stock.  Allow soup to simmer over medium-low heat; don't let it come to a boil.  We'll come back to taste & season in a few minutes.  While it's simmering, make the dumplings.

In a large mixing bowl, combine the ricotta, Parmesan, eggs, flour, at least 1/2 tsp of salt & a few grinds of black pepper & minced basil.  Stir to combine.  The dough will be both stiff & sticky; don't be afraid to use your hands to finish kneading it.  Divide into 4 equal pieces & roll into "snakes", then slice into equal pieces.  Set aside for a few minutes while you taste the soup.

Taste & adjust the seasonings to the soup as needed.  I added more salt to mine as well as some fresh squeezed lemon juice which added the brightness that was lacking.  If you prefer a spicier soup, add more red pepper flakes.With the soup still at a simmer, carefully add the dumplings & the minced basil.  The dumplings will cook quickly--2 to 5 minutes depending on what size you made them.  Serve with more basil & parm for topping & a good bread to soak up the broth.


Not the best lighting, but that's one delicious ricotta-parm dumpling right there!Not the best lighting, but that's one delicious ricotta-parm dumpling right there!