Saturday, January 24, 2015

Cheese & Herb Scones

I'm of two minds about scones. If I make them or buy one from an independent bakery, they're amazing and delicious and tender and buttery. If I purchase them at a coffee shop or a chain grocery store, more often than not they're dry and crumbly and not that tasty. Drizzling glaze over them only makes them hyper-sweet and sometimes hard as cement; the glaze ends up glueing together chunks of flavorless crumbs. Ick.

I started making scones about the time I started high school. Someone gave me a little cookbook of scone recipes, both sweet and savory, and I immediately fixated on one particular recipe. It called for finely chopped walnuts in the dough and then before baking, you cut a slit in the top and slid in a teaspoon of strawberry jam which bubbled up in the oven and glazed the top. My dad loved them so I never varied that recipe. I've made other kinds of scones since then; lemon blueberry (pictured below), almond cherry, currant, and white chocolate craisin. 


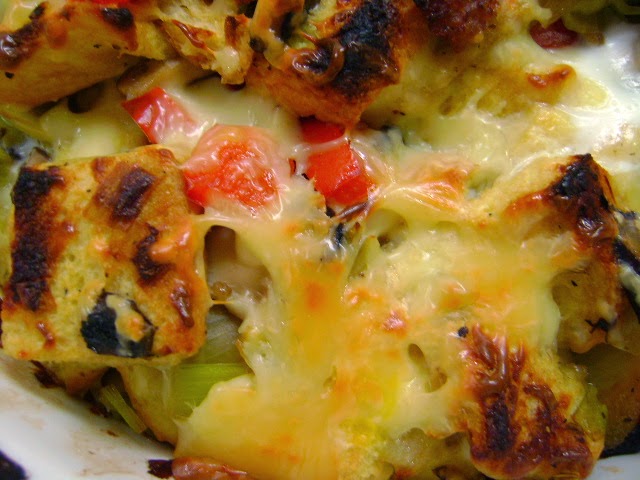
My first savory scone was from a bakery in Leavenworth, Washington (which is a Bavarian themed village in the Cascades and not the penitentiary in Kansas). It was chock full of cheddar cheese, bacon, and scallions in a tender, buttery dough and I could've eaten a few more of them and skipped lunch altogether. This particular recipe focuses on fresh herbs and cheese rather than bacon and scallions, but they're just as delicious!

My first attempts at replicating savory scones weren't great. I mean, they were edible and had bacon in them, but they weren't very tender and flaky. There are a few ways to make tender and flaky baked goods; use real fat (butter and/or lard), handle as little as possible, and increase the amount of protein and fat by adding eggs and/or some kind of dairy. Don't freak out on me here. The fats and proteins are what make baked goods tender (not dry) and flaky (a desired result in pastries and pie crusts). If you're looking for a low-fat option for scones, you won't find it here.

Ingredients:

2 cups flour
1 teaspoon baking powder
1/2 teaspoon salt
1/4 teaspoon baking soda
1 stick butter, cut into small pieces and frozen (leave in freezer until needed)
1 cup grated or shredded Cheddar cheese or other cheese of your choice
1/2 cup fresh herbs of your choice, finely chopped
1/2 cup sour cream
1 egg

Preheat oven to 400 degrees. Line a baking sheet with parchment paper and set aside. You can also use a sheet of foil, lightly greased, to line the baking sheet.

In a small bowl, whisk the egg and sour cream together and set aside til needed.

In a large mixing bowl, combine the flour, baking powder, salt, and baking soda. Use a fork or a whisk to combine. Add the frozen butter pieces and use a pastry cutter to work into the flour mixture until it resembles coarse sand. Add the cheese and herbs and toss gently to coat with the butter and flour mixture. Use a fork to stir in the egg and sour cream mixture until just combined. Using your hands, turn the dough out onto a floured surface and divide into two equal balls. Pat each one flat into a disk and use a sharp knife to cut into wedges.

Transfer to the prepared baking sheet. If you like, brush the tops with melted butter or a beaten egg. Bake for 15 to 17 minutes or until golden brown. Allow to cool on the baking sheet for a couple minutes and then transfer the scones to a wire cooling rack.

Cook's Notes:

  1. Let's start with the herbs. The creator of the original recipe wanted a recipe that used up a lot of her herbs from her garden. A half cup may seem excessive, especially if you're not accustomed to using fresh herbs in your recipes, but fresh herbs don't have the same punch of flavor as dried herbs. Once dried, the aromatic oils in herbs are concentrated which is perfect for adding to dishes which need to cook for a long time. Fresh herbs are best for adding as a garnish to a completed dish, to salads of all kinds, or to quick breads and scones which don't spend a lot of time in the heat. If you're fortunate enough to have an herb garden or you know someone who grows herbs, you can mix'n'match: thyme, dill, rosemary, parsley, tarragon, oregano, basil, mint, cilantro, savory, etcetera and so on. Rinse the herbs, pat dry with paper towels, and use a very sharp knife to finely chop.
  2. I prefer to use sharp Cheddar in baked goods as the flavor stands up better than medium or mild Cheddar. Like the herbs, the choice of cheese is up to you. Try Gruyere and mozzarella with oregano, basil, thyme, and a little mint for an Italian flavor. Use a blend of pepper jack and white Cheddar with cilantro, parsley, and oregano for a hint of the Southwest. 
  3. Butter, people, real butter. It can't be beat. And even though a lot of recipes call for unsalted butter so that the baker can adjust the amount of salt to their preference, I always use salted butter because it adds another layer of flavor. Plus, salted butter's often less expensive than unsalted. 
  4. I generally buy store brands products unless name brand are on sale and comparable. I make a few exceptions for items such as Best Foods mayo and Daisy sour cream. I'm not sponsored by these brands nor do I get reimbursement or freebies from them; they're just tried'n'true brands. I really like Daisy sour cream because it only has one ingredients: Grade A cultured cream. There are no stabilizers, no additives, and no preservatives. I like the fresh tangy flavor and the only drawback (if you can even call it that) is that the sour cream "weeps". I either stir the liquid back into the sour cream or drain it off into the sink.
  5. I've pretty sure we've discussed pastry cutters before and if you don't have one, get one. They're not expensive and they're much more effective and efficient than using a couple of forks or knives to try to cut hard chunks of butter in to the flour mix.
  6. Let me leave you with two very important pieces of advice: first, keep the fats (butter, sour cream, egg) as cold as you can. The cold fats between layers of flour is what creates the flakiness in the finished product. As they heat up in the oven, the waters boil and create steam which puffs up the dough. Second, work the dough as little as possible so you don't create gluten which gives baked products like bread their chewiness.
These cheese and herb scones are great with soups and salad or as an alternative to rolls alongside a pot roast or grilled salmon. Don't be intimidated by all my instructions; it just sounds difficult! And I rather give you more info than not enough.

Tuesday, January 13, 2015

Savory Mushroom & Leek Bread Pudding

First off, I need to admit something to you: I dislike taking photos of my food. Apparently, the Instagram gene is not present in my DNA. I don't like taking the time at every step anymore because it slows down my efficiency; the lighting is not good in the kitchen where I work (fluorescent bulbs everywhere); and most importantly, it bugs me that some of the food blogs I read have more similar looking photos of the recipes in various stages than they have actual instructions. In fact, I just looked at one blog, counted the number of photos in ten different posts and came up with an average of 31 photos per post. If you want 31 of something, then visit your local Baskin Robbins. Who has that kind of time? Well, people who get paid for blogging have that kind of time, and I don't get paid. Plus, I'd rather be reading a cookbook or a great thriller than snapping away in the kitchen. Anyhow, I want to include one photo per post so you have some idea of what the completed dish looks like. Or should look like. Actual finished products may vary.


So, bread pudding. Most people think of bread pudding (if they think of bread pudding at all) as a sweet dessert. Found in cultures all over the world, sweet bread pudding utilizes stale bread in a mixture of milk, spices, some kind of sugar, sometimes liquor, and usually dried fruit of some type. Savory bread pudding takes the same concept of using up stale bread but instead of sweet additions, you add sauteed vegetables, grated cheese, and sausage. Similar to stuffing or dressing that's on the table for Thanksgiving or Christmas feasts, savory bread pudding is a great accompaniment to big pieces of protein, like turkeys or roasts. Even better, you can customize the ingredients to your particular taste. Don't like bell peppers? Leave 'em out. Have extra broccoli? Toss it in. Prefer turkey sausage? It's your dish; make it the way you like it.

Ingredients:

1 red bell pepper, diced
2 leeks, white & light green parts, sliced & rinsed well
3 cups mushrooms, sliced
1/2 pound bulk Italian sausage
1/2 pound Gruyere, grated
10 cups cubed day old bread
3 eggs, whisked together
1 1/2 cups whole milk
1 tsp fennel seeds (optional but highly recommended)
salt & pepper to taste

Preheat oven to 350 degrees and set out a large baking dish or two smaller ones.

In a small bowl, whisk the eggs and milk together with about half of the grated Gruyere and set aside.

In a large stockpot, cook the sausage over medium high heat until browned. Reserving the rendered fat, scoop out the cooked sausage and set aside. Add the bell pepper, leeks, and mushrooms to the rendered fat still in the stockpot and saute for 5 minutes or so. Season the veggies with salt and pepper and the fennel seeds if using. Cook a few minutes more. Remove from heat.

Add the stale bread cubes and toss to combine with the sausage and veggie mixture. Transfer to the baling dish(es), pour the milk and egg mixture over, and top with the remainder of the grated Gruyere.

Bake for about 40 minutes, uncovered, and then broil for a few minutes to brown the top, if you'd like.

Cook's Notes:


  1. The kind of bread you use is completely up to you. I found a great loaf of brioche sandwich bread which added a great buttery and slightly sweet flavor which paired well with the red bell pepper and leeks. You can use a sturdier bread, like a sourdough; completely up to you. At least two of my local markets carry bagged cubed bread in their bakeries. Just make sure that the bread is truly stale and a little hard; if it's too fresh and soft, the end result will just be mush.
  2. Leeks don't get the love they deserve. They're in the same family as onions and garlic, Allium, and have a mild flavor somewhere in between the two. I've found that most markets sell leeks in bundles of three; go ahead and buy a bundle. Leeks are pretty hardy and can last in the fridge for longer than you might think. You can also slice them up and freeze them if you'd like.
  3. Mushrooms. I love mushrooms. I wish more people loved mushrooms because then there'd be a more of a demand for different varieties in the local markets. I didn't have the time this past week to go to the Asian market where they carry at least a half dozen varieties, if not more, but I was quite pleased to find fresh shiitakes alongside the more pedestrian white and crimini mushrooms in one of the local stores. Use whatever mushrooms you want.
  4. When I was frying up the sausage, I decided that it needed some flavor, so I added whole fennel seeds. Yum! I think next time I may increase the amount of fennel; I could taste it but not as strongly as I'd prefer.
  5. Gruyere. This is a mild young Swiss cheese, slightly sweet and salty and nutty. It add savoriness without overpowering the other ingredients in the dish, such as quiches, crostinis for onion soup, and chicken cordon bleu. You can certainly use good ol' cheddar, but I urge you to break out of your cheese mold (see what I did there?) and try something new.
Serve savory bread pudding with roast chicken or a pork or beef roast and a nice green salad on the side. Give it a try and let me know what you think!


Sunday, January 11, 2015

Irene's Peanut Butter Cookies

I have a love/hate relationship with making cookies. I love mixing up a batch & sneaking bits of raw dough; I hate standing around for minutes at a time waiting for each tray to bake. Also, the ovens I've used in the last several years have tended to run hot and as much as I've tried to adjust the temperature, I just am not pleased with the results. The cookies spread too much & the edges get darker than the center and I get frustrated.

Irene was my paternal great-grandma and I'm fortunate enough to have known her into my teens. She lived to be 94 and was just a character. She loved watching WWF, the Seahawks, and the Sonics; she wore a perpetually crooked wig; and I believe there's only one photograph of her in trousers. She always wore house dresses. She grew African violets and had a dozen or more in her living room window. I've tried to have a few over the years in her memory and I just don't have good luck with them. Probably because I prefer my living environment much cooler than Irene and the violets did! At least I can make her peanut butter cookies.

Ingredients:

1/2 cup butter, room temperature
1/2 cup shortening i.e. Crisco or good ol' lard, room temperature
1 cup peanut butter
1 cup packed brown sugar
1 cup white sugar
2 eggs
1 teaspoon vanilla extract
3 to 3 1/2 cups flour
1 teaspoon baking soda

Preheat oven to 375 degrees.

Combine 3 cups of flour and baking soda in a separate bowl & whisk to combine.

Using a large mixing bowl or stand mixer, combine the butter, shortening, brown sugar, and white sugar. Cream together for at least 2 minutes; you want the resulting paste to be light in color and creamy. Add the peanut butter and vanilla beat well. Add the eggs, one at a time, beating well after each addition. Tip in about half the flour mix and mix well, then add the remainder of the flour. If you need to, add up to a half cup more of flour to make a thicker dough.

Portion out the dough on ungreased baking sheets. Using a fork dipped in granulated sugar, gently press down the dough, creating a criss-cross pattern on top.

Bake for 10 to 12 minutes or until the edges are brown and the tops of the cookies don't look greasy. Leave on the baking sheets for an additional two minutes before carefully transferring to coolong racks.

Cook's Notes:

1. I prefer crunchy peanut butter for everything, even Thai peanut sauce. You can certainly use creamy peanut butter if that's what you have in your pantry.

2. Listen. Creaming the fats and sugars together is really important. Sugar granules have sharp little edges and as they're agitated during the mixing, they cut into the fats and add air to create a leavening effect.

3. Don't over-bake the cookies; check them after 8 minutes and see if the tops have lost their sheen & gotten a little darker on the edges. Cookies also continue to bake as they sit on the baking sheets. You want them to cool for at least 2 minutes before transferring to wire cooling racks so they don't fall apart.

4. These are nice sturdy cookies which freeze well and even ship well. 

5. You can easily turn them into peanut butter blossom cookies which just means that you place an unwrapped Hershey's Kiss in the center of each unbaked cookie. Yum!


Friday, January 9, 2015

A Story of Braised Beef or How I Made Stroganoff From Cheap Meat

I've had a beef short rib craving since summer. I tried short rib sliders at two different locations and because I didn't write them down (which is something I think I need to start doing), I can't remember exactly how they were seasoned. All I can remember is how meltingly delicious the meat was on those little brioche buns. YUM!! I've made short ribs once since then, simply seasoned with salt and pepper, and I want to try other flavors, like a red wine braise or a sweet chili one. The problem I run into is cost. Short ribs used to be cheap, like flank steak, but because the cuts have become popular with celebrity chefs, the cost has gone up. Because beef short ribs are marbled with fat, the cut needs to be cooked low and slow in moist heat; braised. This allows the fat and collagen to break down and renders the meat so moist and tender.

I went in search of beef short ribs this last week. I ended up buying chunks of beef on the bone, which was labeled as "bone-in beef stew chunks", mainly because they were on sale and also because I wanted to see what I could make from them. They went into the slow-cooker with a little salt and pepper and braised for 10 hours. I then stored them in the fridge as-is, still in the slow cooker insert and still in their own rendered fats, gelatin, and juices. There's a couple of reasons I do that; first, it allows the meat to reabsorb some of the moisture lost during cooking. Second, once the meat cools, the rendered fats harden on top of the cooked meat and you can pull it off in chunks rather than trying to deal with hot fat.

I spent some time deciding what in the world to do with this mess of meat. Once I pulled the meat off the bones (and there were a lot more bones than I expected), I thought about smothering it in barbecue sauce and making sandwiches. In the end, I was inspired by my brother and sister-in-law. They make stroganoff once a week and I realized that the meat would be perfect for that. Plus, I had mushrooms, an onion, sour cream, and pasta all waiting to be used.

Here's how it came together in the end:

In a stockpot, I melted the rendered fat which I removed from the beef and added a diced onion and a couple cups of diced mushrooms. I cooked them down for a bit with some salt, pepper, and a pinch of savory until the onions and mushrooms were just turning brown. I added about a quarter cup of flour and cooked it for a few minutes, then I added the beef which I had shredded and the gelatin as well along with a few shakes of Worcestershire sauce. I cooked the whole delicious smelling mess for a few more minutes and then added two cups of milk to create a cream sauce and let it simmer for about ten minutes to thicken up. After the stroganoff cooled, I stirred in a dollop of sour cream for added richness and tang and served (to myself) over noodles. Yum! I ended up with so much that I ate it for breakfast, lunch, and dinner for three days. I think I'm satiated now.

The only drawback I had was with the type of pasta I used; it turned out mushy. Like, icky mushy. I've used the particular brand of pasta before and it cooked up al dente. This shape of noodle recommended cooking for eight to ten minutes which usually means that I start testing them for doneness at six minutes. Which I did and they were already mushy. Not pleased. No pasta should ever be mushy, no matter what the intended use.

In the long run, my beef experiment turned out delicious and I found beef short ribs marked down $3 at the store, so I snapped them up and put them in the freezer for later in the month. I look forward to cooking those up and sharing the recipe with you!

Tuesday, January 6, 2015

Tortellini & Chicken Bake

I've been away too long, my faithful followers! The weekend after Thanksgiving, which was also my birthday, I picked up a nasty case of food poisoning somehow. That laid me low for a few days. Then I had to get a bunch of work done on my car the same week that I needed to move some stuff from one storage place to another. Once that was completed (and thank God for the people who helped me!!), I was able to do a little Christmas shopping for my little nieces and nephews and spend an afternoon with a good friend. And somewhere in there, I picked up a nasty case of bronchitis. Like, it's been nearly three weeks and I still have the occasional coughing fit. In spite of all that, I had a nice Christmas Eve dinner with part of my family; prime rib, mashed potatoes and gravy, green bean casserole, and roasted Brussels sprouts with sauteed mushrooms. We had pizza for our sibling get-together several days later; much more casual but just as delicious. Because it's pizza. And pizza is delicious.

That's been my life. I've missed cooking for myself, so I decided that I would make a list of eight different dishes to make over the course of a month, prepare two of them a week, and then blog about them. That's the extent of my New Year's resolutions, by the way. I don't do well with change; I have to ease into change, like introducing a cat to a dog. I also have a huge aversion to going with the flow. It literally makes my skin crawl to do what other people do and I rarely use the word, "literally" unlike Chris Traeger. 

This week so far, I made the following recipe and boy, I wish I had doubled it! It's definitely comfort food and it doesn't take much time to pull together.

Ingredients:

2 cups pre-cooked and shredded chicken
2 cups broccoli
1 package (16 ounces) frozen cheese-filled tortellini
5 tablespoons butter
5 tablespoons flour
2 and 1/2 cups chicken broth, warmed
1/2 cup milk, warmed
4 ounces cream cheese
Up to 1/2 cup breadcrumbs

Preheat oven to 350 degrees. Set aside a large baking dish, 9" by 13" at least. 

In a large bowl, combine the chicken, broccoli, and frozen tortellini. Set aside while you're making the sauce. 

In a large saucepan, melt the butter over medium high heat. Once it's melted, add the flour and cook for a couple minutes til smooth and lightly browned. Slowly add the warmed chicken broth and warmed milk, whisking constantly to ensure a smooth sauce. Continue to cook for a couple of minutes, remove from heat and then stir in the cream cheese. Taste and add salt and pepper according to your taste. Once you have a smooth sauce, gently pour over the chicken, broccoli, and tortellini. Toss gently to coat all ingredients with the sauce and transfer to the baking dish. Top with the breadcrumbs, if using, and a sprinkle of Parmesan if you so desire.

Bake for 30 minutes until bubbly and the breadcrumbs are golden brown. 

Cook's Notes:


  1. You can totally use precooked, shredded chicken for this dish instead of cooking your own. My Albertson's sells packages of roasted, shredded chicken which they pull off the unsold roasted chickens from the previous day. You can also poach several boneless chicken breasts and/or thighs ahead of time; there are endless possibilities for leftover chicken and it freezes beautifully.
  2. I prefer using fresh broccoli rather than frozen. Heck, I prefer fresh vegetables over frozen almost always. It's a texture thing; frozen veggies tend to be mushy. But it's up to you.
  3. The original recipe calls for making the roux (the sauce) with mostly milk rather than chicken stock. I switched the proportions and I think it was just right. The most important thing in making the roux is to cook the flour into the butter so you end up with a toasty flavor instead of a raw flour flavor.
  4. Cream cheese. The recipe calls for plain cream cheese but I had a partial container of chive cream cheese I needed to use up, so I used that instead. Amazing. It added just enough onion-y flavor without being overpowering. You can boost the flavor by adding garlic and/or onion powder to the roux.
  5. When I was at the store buying the ingredients, the frozen cheese tortellini were priced over a dollar more than the frozen cheese ravioli. So I bought the ravioli and used that instead. Use whatever stuffed pasta you prefer. 
I hope you try a new recipe or several new ones this year! I want to inspire you to be more confident in the kitchen and to step away from following recipes to the letter, to make substitutions and to trust your intuition.